Drawing the moon is a delightful and rewarding artistic endeavor that captures the imagination and resonates deeply with human culture. The moon, with its serene beauty and ethereal presence, has been a symbol of mystery, romance, and inspiration throughout history. This guide will walk you through the process of how to draw the moon, from basic shapes to detailed textures, and provide tips on capturing its various phases and atmospheric presence.
How to Draw the Moon
The moon holds a special place in art and culture. From ancient mythologies to modern science fiction, it has been a source of fascination and artistic inspiration. Its ever-changing phases and craggy surface offer endless opportunities for artistic exploration. Whether you’re a seasoned artist or a beginner, drawing the moon can be a meditative and enjoyable experience, allowing you to connect with a subject that is both familiar and enigmatic.
Drawing the moon can be approached in many ways, from simple sketches to highly detailed renderings. This tutorial aims to make moon drawing accessible to everyone, providing step-by-step instructions and tips to help you create a beautiful representation of our nearest celestial neighbor.
Materials Needed to Draw the Moon
Before you begin, gather the necessary tools and materials. Here is a list of items you will need to draw the moon:
1. Paper: Choose a smooth, high-quality drawing paper. A heavier weight paper is preferable as it can handle erasing and multiple layers of shading.
2. Pencils: A range of pencils from HB to 6B will give you the versatility to create light sketches and deep shadows. Mechanical pencils can also be useful for fine details.
3. Erasers: A kneaded eraser is ideal for subtle erasing and highlighting, while a standard eraser can handle more substantial corrections.
4. Blending Tools: Blending stumps or tortillons are perfect for smoothing out pencil lines and creating gradient shading.
5. Ruler and Compass: A ruler and compass can help you draw perfect circles and measure proportions accurately.
6. Colored Pencils or Markers (optional): If you wish to add color to your moon drawing, have a selection of colored pencils or markers on hand.
7. White Gel Pen or Chalk (optional): These can be used to add highlights and bring out the moon’s luminosity.
Basic Shape and Structure
Start your moon drawing by focusing on its fundamental shape. The moon is essentially a sphere, but it often appears as a flat circle in the sky due to its distance from Earth. Here are the steps to draw the moon’s basic shape:
1. Draw a Circle: Use a compass to draw a perfect circle on your paper. If you don’t have a compass, trace around a round object such as a cup or a lid. This circle represents the full moon.
2. Divide the Circle: Lightly draw a vertical and horizontal line through the center of the circle to help you maintain symmetry and guide the placement of surface details.
3. Sketch the Irregularities: The moon’s edge is not perfectly smooth. Lightly sketch some irregularities along the circumference to reflect the natural craters and highlands on the moon’s surface.
These simple steps establish the foundation of your moon drawing, making it easier to add detailed features later on.
Surface Details
Adding surface details to your moon drawing will bring it to life. The moon is covered with craters, valleys, and highlands that give it a distinctive texture. Here’s how to add these features:
1. Identify Major Craters: Look at reference images of the moon to identify major craters. Sketch these lightly within your circle. Famous craters like Tycho, Copernicus, and Clavius can serve as focal points in your drawing.
2. Draw Craters and Valleys: Use short, curved lines to outline the craters. Vary the size and depth of the craters to add realism. Some craters will be shallow with smooth edges, while others will be deeper with more defined rims.
3. Add Highlands and Lowlands: The moon’s surface is not flat. Sketch areas of highlands and lowlands using wavy lines. These regions can be shaded later to enhance the three-dimensional effect.
4. Detailing the Surface: Add smaller craters and imperfections across the moon’s surface. These details should be random and varied to mimic the natural appearance of the lunar surface.
By layering these elements, you can create a textured and realistic representation of the moon’s surface.
See also: How to Create Doodling Art
Shading and Lighting
Shading is crucial to giving your moon drawing a three-dimensional look. The way light interacts with the moon’s surface can make your drawing appear more realistic. Here’s how to achieve effective shading and lighting:
1. Determine the Light Source: Decide where the light source is coming from. For the moon, the light usually comes from the sun. This will determine where the highlights and shadows fall.
2. Shade the Dark Side: Start shading the side of the moon that is farthest from the light source. Use a soft pencil (like 4B or 6B) to create deep shadows. Blend the shading with a blending stump to smooth out the pencil lines.
3. Create Gradients: Gradually decrease the pressure on your pencil as you move towards the light source, creating a gradient from dark to light. This will give the moon a rounded appearance.
4. Highlight Craters: Use a kneaded eraser to lift off graphite from the edges of craters to create highlights. This contrast will make the craters stand out and appear more three-dimensional.
5. Add Highlights: Use a white gel pen or chalk to add small highlights on the moon’s surface. These should be placed where the light hits the most, emphasizing the texture and depth of the moon’s surface.
Effective shading and lighting techniques will transform your moon drawing from a flat circle into a realistic, spherical celestial body.
Phases of the Moon
Drawing the different phases of the moon can be a fascinating exercise that showcases the interplay of light and shadow. Here’s how to draw the moon in its various phases:
1. New Moon: The new moon is not visible because the side facing Earth is in shadow. To represent this, you can draw a faint outline of the moon’s circle but leave it mostly shaded.
2. Crescent Moon: Draw a slim, curved shape representing the lit portion of the moon. The rest of the circle can be lightly sketched and shaded to indicate the shadowed part.
3. First Quarter: Half of the moon is lit, and half is in shadow. Draw a straight line down the center of the circle to divide the light and dark areas. Shade one half and leave the other half lighter.
4. Gibbous Moon: More than half of the moon is illuminated. Draw a larger lit portion with a curved edge and shade the remaining part.
5. Full Moon: The entire circle is illuminated. This is the easiest phase to draw as it involves shading the surface details uniformly.
6. Last Quarter: Similar to the first quarter but with the opposite side illuminated. Draw a straight line to divide the circle and shade accordingly.
7. Waning Crescent: Similar to the crescent moon but with the illuminated part on the opposite side. Draw the slim, curved shape and shade the rest.
Understanding the phases of the moon and how light interacts with its surface will help you create accurate and dynamic moon drawings.
See also: Tips & Methods to Drawing Hair
Finishing Touches
Once you have completed the main elements of your moon drawing, adding finishing touches can enhance its overall appearance. Here are some tips to refine your artwork:
1. Refine Edges and Details: Go over the edges of the moon and craters to sharpen and define them. Add any final details to the surface to make it more realistic.
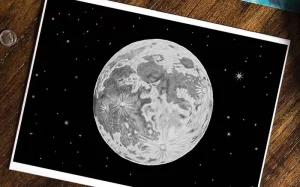
2. Add Background Elements: Including stars, clouds, or a distant landscape can provide context and depth to your moon drawing. Use a white gel pen to dot stars in the sky or blend charcoal to create soft, wispy clouds.
3. Create a Glow: To make the moon appear luminous, lightly blend white chalk or a white pencil around the moon’s edge. This will give the impression of a glowing aura.
4. Review and Adjust: Step back and look at your drawing from a distance. This can help you see areas that might need more shading or details. Make any necessary adjustments to balance the overall composition.
5. Sign Your Artwork: Don’t forget to sign your drawing. This adds a personal touch and signifies that your artwork is complete.
With these finishing touches, your moon drawing will be polished and ready to be admired.
Conclusion
Drawing the moon is a journey that combines creativity, observation, and technique. By following the steps outlined in this tutorial, you can create a beautiful and realistic depiction of the moon. Whether you are drawing a full moon, exploring its phases, or adding intricate surface details, each step brings you closer to capturing the moon’s mystique.
Remember to experiment with different materials and techniques to find what works best for you. The moon’s ever-changing appearance offers endless possibilities for artistic exploration. So, gather your materials, find a quiet space, and let the moon inspire your next masterpiece.
Related Topics: